

Core Inspection provides the ability to capture time and materials against a job and against individual inspections.
Please contact support@coreinspection.com if you would like us to set this up for you.
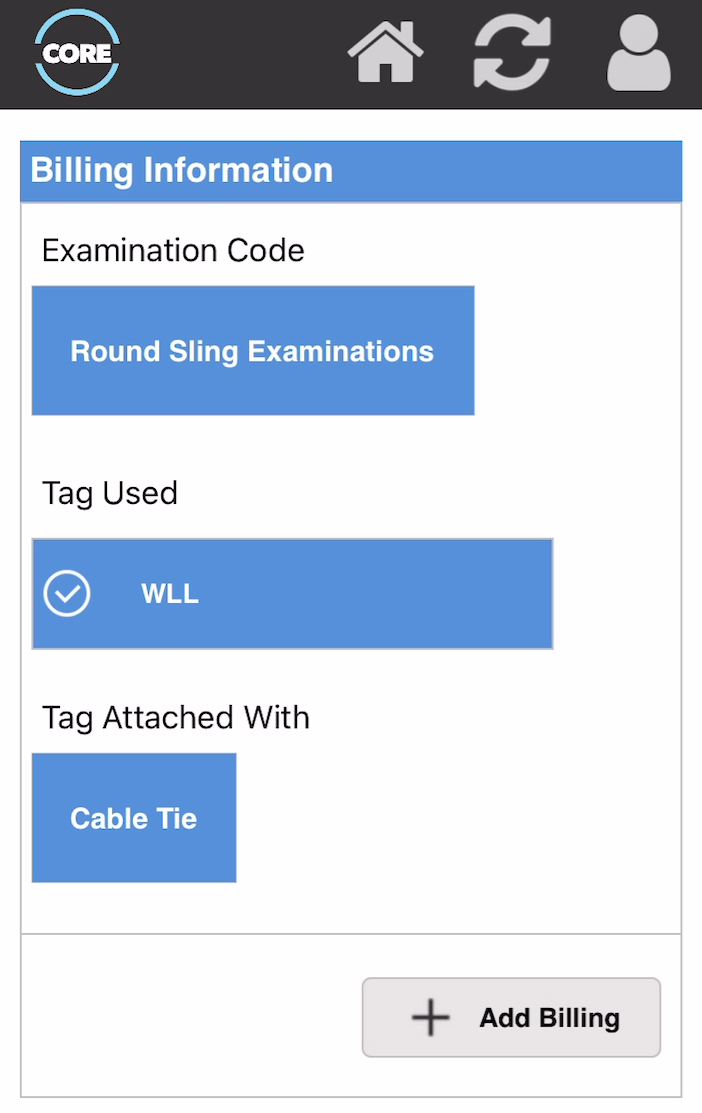
Once billing has been set up, for every examination performed you will get the following options.
1. Examination Code. This records the type of examination being performed and can have a cost associated with it.
2. Tag Used. This records the type of tag that was used on the examination.
3. Tag Attached with. This records what the tag was attached with. (For example Cable Tie, Wire Ring)
The technician can also at this stage record any other parts or materials that were used in the examination.
The screen shot below shows an example of what the technician might see on their tablet whilst performing the examination.
At any stage during the job, the technician can also add other time and materials against the job by going into "Service Records".
Once the job has been completed and synced. The time, materials, tags, examination codes for each technician can all be viewed on the webportal by taking the following steps.
1. Log in to the web portal.
2. Go to Jobs and open the relevant job.
3. Go to the "Service Records" tab.
4. Click open against the relevant service record.
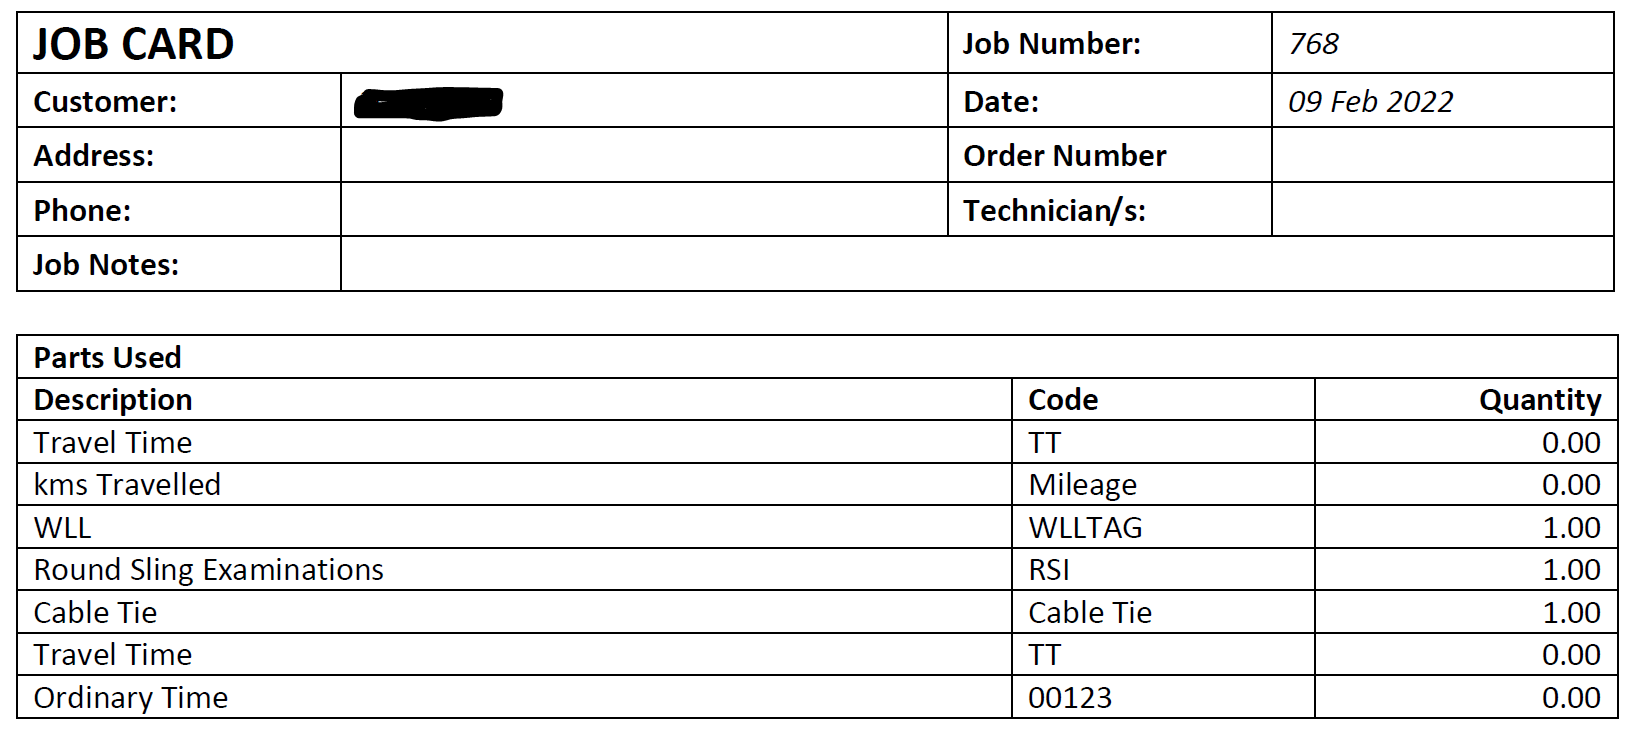
5. A job card can also be set up that shows all of the billing information across the job for all technicians.
Below is an example of what this report can look like.
Configuring Billing
In the screenshot above, you will see that there are options for examination code, tag used and tag attached with. These are selected by the technician when performing an examination.
These options must be configured by the admin for each inspection template. This can be done by taking the following steps
1. Add The Parts
First you must set up part codes for each of these. To do this go to configuration -> parts and add in each part. When adding a part there is a type drop-down, please see the screenshot below. 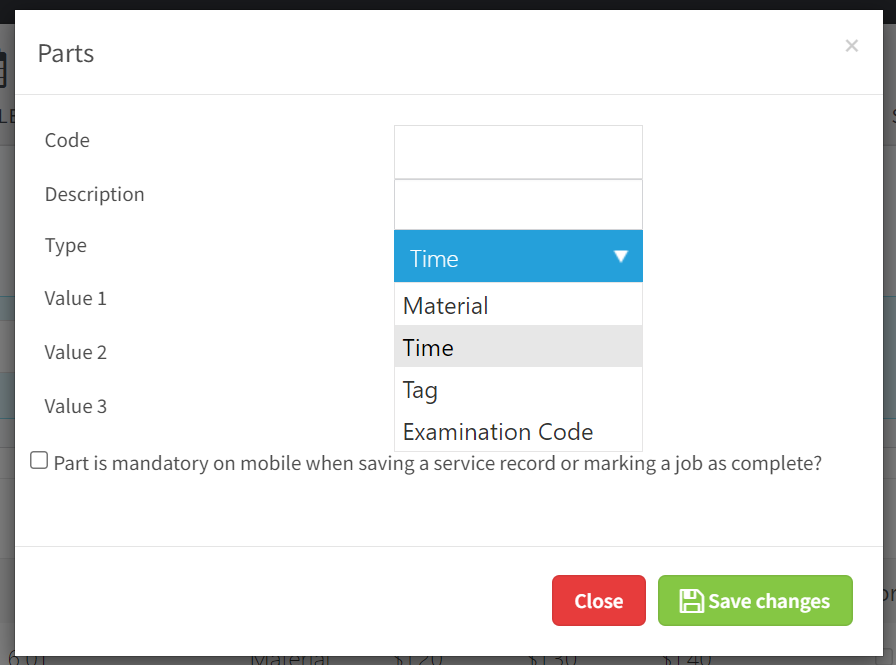
For the part to appear under examination codes it must be set up as type "examination code".
For the part to appear under "tag used", it must be set up as type "Tag".
For the part to appear under "tag attached with". It must be set up as type material.
2. Configure the templates
Once the parts have been set up, the administrator needs to specify the parts available for each inspection template. To do this, open the inspection template and click more options. You will see a screen like the screen below. Select the relevant parts and press save.

Repeat this for each inspection template.