

Core Inspection Office 365 calendar configuration
This guide describes how administrators configure Core Inspection to push scheduled jobs into users' Outlook calendars. The integration is a one-way push from Core to Outlook — Core creates, updates, and deletes events on behalf of each worker, and any changes made directly inside Outlook will be overwritten on the next sync.
Once configured, Core syncs scheduled jobs every 5 minutes for a rolling 3-week window, pushing the job details (subject, customer reference, contact, phone numbers, address, and notes) into each assigned worker's calendar in their local timezone.
What you will need
- An Azure / Microsoft Entra account with permission to create app registrations and grant admin consent at the tenant level.
- The Outlook / Exchange Online mailbox address for each Core user whose calendar should be synced.
- A secure way to share three values with the Core team: Tenant ID, Client ID, and Client Secret.
Step 1 — Create an App Registration
The app registration is what Core uses to authenticate against the Microsoft Graph API when reading timezones and writing calendar events.
- Sign in to the Azure Portal (portal.azure.com) and open Microsoft Entra ID (formerly Azure Active Directory).
- Select App registrations, then New registration.
- Give the application a recognisable name (for example, Core Inspection Calendar Sync). For Supported account types, choose Accounts in this organizational directory only. Leave the Redirect URI blank.
- Click Register.
Step 2 — Record the Tenant ID and Client ID
On the Overview page of the new app registration, copy the following two values — you will share them with the Core team in Step 5.
- Application (client) ID
- Directory (tenant) ID
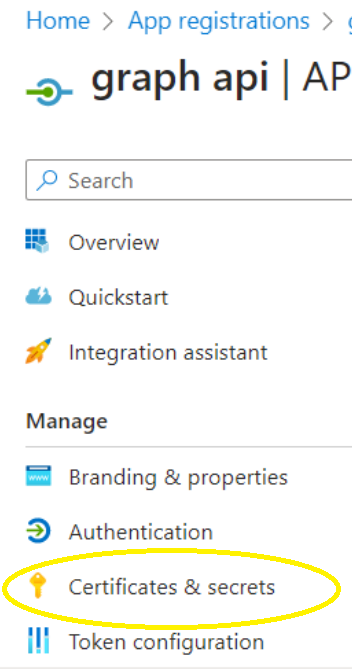
Step 3 — Create a Client Secret
- In the app registration, open Certificates & secrets, then Client secrets → New client secret.
- Enter a description and choose an expiry period. We recommend the longest period allowed by your organisation's policy, as the sync will stop working when the secret expires and you will need to issue a new one.
- Click Add, then immediately copy the Value column — this is the client secret. Azure will only display it once; if you navigate away you will need to create a new secret.
Important: copy the Value, not the Secret ID. The Value is the longer string and is what Core needs.
Step 4 — Grant API permissions
Core needs two Microsoft Graph permissions on the app registration. Both must be added as Application permissions — not Delegated — because the sync runs unattended.
- In the app registration, open API permissions → Add a permission → Microsoft Graph → Application permissions.
- Add each of the following:
- Calendars.ReadWrite — lets Core create, update, and delete calendar events on each user's behalf.
- MailboxSettings.Read — lets Core read each user's configured Outlook timezone so events appear at the correct local time.
- Click Grant admin consent for [your tenant] at the top of the permissions list. Both permissions should then show a green tick in the Status column. Without admin consent the sync will fail with authorisation errors.
Step 5 — Share the credentials with Core
Send the following three values to the Core Inspection team through a secure channel (for example, a password manager share or encrypted email):
- Directory (tenant) ID
- Application (client) ID
- Client secret Value (from Step 3)
Core will store these against your site and use them to authenticate the sync.
Step 6 — Set each user's calendar email in Core
Core only syncs events for users who have a Calendar Email value set. For each worker that should receive calendar events, edit their user record and enter the Exchange Online / Microsoft 365 mailbox address they log in to Outlook with.
The address must belong to a licensed mailbox in the same tenant as the app registration. Users without a Calendar Email, or with an address that does not resolve to a real mailbox in that tenant, are skipped by the sync.
What gets synced
Every 5 minutes, Core looks at each configured user's jobs for the next 3 weeks and pushes any new, updated, or cancelled jobs to their Outlook calendar. Each calendar event contains:
- Subject: Core Job — [Client name] ([Site name])
- Location: the full job address, so Outlook will offer directions/map links.
- Body: job subject, customer reference, contact name, mobile, phone, email, address, and notes / customer requirements. Empty fields are omitted.
- Start & End: the scheduled time of the job, rendered in the user's Outlook timezone (falling back to the site timezone if not set).
If a job is rescheduled in Core, the corresponding Outlook event is updated on the next sync. If the job is cancelled or the worker is removed from it, the event is deleted.
Troubleshooting
- Events aren't appearing in a user's calendar. Check that the user's Calendar Email in Core matches their real Microsoft 365 mailbox address exactly, that their mailbox is licensed, and that the permissions in Step 4 show as granted with admin consent.
- Sync stopped working after some time. Client secrets expire. If sync suddenly fails, check whether the secret has expired in Azure; if so, create a new one (Step 3) and send the new value to Core.
- One user isn't getting events while others are. Core automatically stops retrying mailboxes that return MailboxNotEnabledForRESTAPI or ErrorInvalidUser, to avoid repeated failure noise. Once the underlying issue is fixed (license assigned, mailbox provisioned, address corrected), contact Core to re-enable that user.
- Events are showing in the wrong timezone. Core uses the timezone configured in the user's Outlook mailbox settings. Ask the user to check their Outlook timezone under Settings; if that isn't set, Core falls back to the timezone on the Core site.
- Edits made in Outlook are lost. This is expected — the sync is one-way from Core to Outlook, and any manual edits will be overwritten on the next sync. Make scheduling changes in Core.