

Jobs Screen
The Jobs screen will show you jobs scheduled in the next 7 days and jobs that have been recently completed. Tap on the job that you want to open.

Equipment Screen
To view the equipment screen, open a job by tapping on it and then click the “View Equipment” button. If no equipment is available press the “sync” button in the top right hand corner.
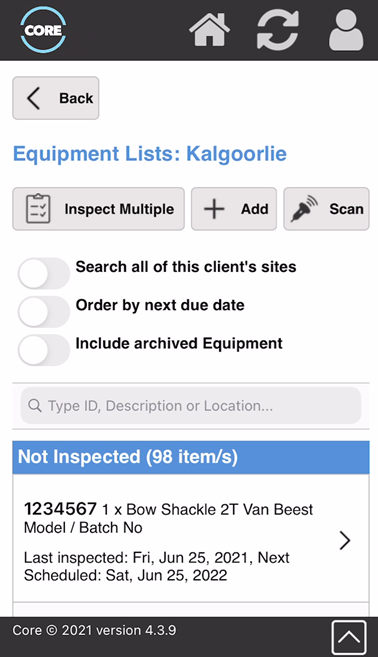
The equipment screen shows all equipment broken into “Not Inspected” and “Inspected”. Not inspected means not inspected as part of this job. Inspected means inspected as part of this job.
Equipment in Orange is due or overdue in the next 30 days. Equipment in Red is in a failed status.
Adding Equipment
To add an item do the following.
- From the Equipment page, press the "Add" button.
- Select the type of equipment you'd like to add.
- Enter an ID marking, Location, Scan unique barcode if applicable, Client Reference (Plant Code)
- Fill out the remaining details and press save.
- You will be warned if this ID number exists at this client site or another client site belonging to this client.
Searching For And Inspecting Equipment
To search for an item do the following.
- From the Equipment page locate the search box that says “Type ID, Description or Location”
- In the search box enter part of the ID number, client ref, or description of the item you want to locate.
- Select “Search all of this clients sites” if you want to search across all of their sites (ie not just this site).
- Click “Include archived equipment” to include equipment that has been archived
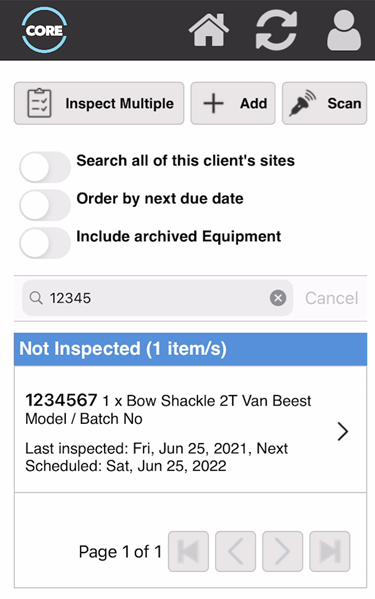
The equipment list will now show you the items that match the search criteria.
To inspect an item once you have found it please do the following
- Tap on the item to open it and you will see the screen below.
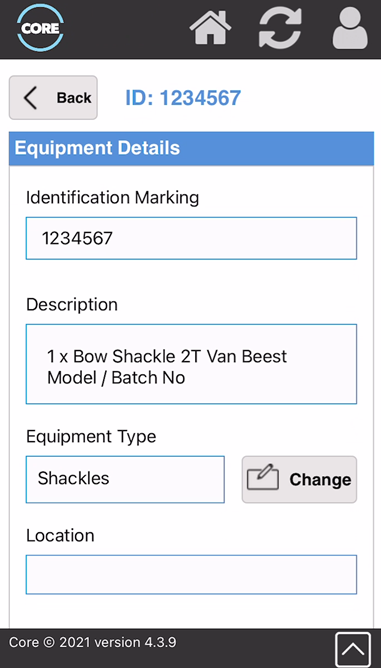
- To change the details click “edit”, otherwise click “New Inspection”.
- You will now either see a screen similar to below or a screen saying “Please select inspection Type”. If you see the “Please select Inspection Type” screen then select the appropriate inspection type.
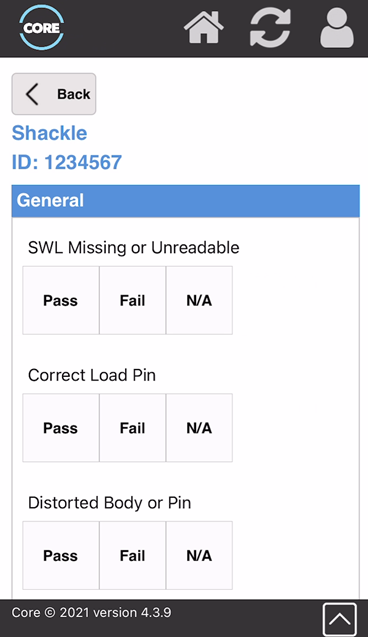
- Fill in the details on each tab and click “Save Inspection”
- If you have failed any lines on the inspection, the item will fail inspection and be changed to a “Fail” Status.
- Add a comment and click “Save” then press “OK”.
- The item will now have been removed from the not inspected list and will now appear on the inspected list.
- Perform as many inspections as required and then when the job is complete click the “Mark as Complete” button on the Jobs page.
Marking A Job As Complete
When a job is completed all items that were due for inspection at that time but were not seen will be moved into a “Not Seen” status. The system will try to send the inspections back to the web portal at this stage. If there is no internet connection then please press the sync button in the top right hand corner next time you have an internet connection.